In contact with
Paper and cardboard are two of the most favorite materials of all educators and primary school teachers. The thing is that cardboard crafts are very interesting and can keep the baby busy for a long time.
At the same time, the material is not only cheap for parents, but is also absolutely safe for children. If you take bright paper, you can make very interesting compositions. They will be useful for developing many skills in a child of any age.
 Paper and cardboard crafts can be not only flat, but also voluminous
 Working with paper and cardboard is good because the kid learns not only to show his creativity and imagination, but also to work with glue, scissors and many other items that are sure to come in handy in life.
The indisputable advantage of paper is that it is available to everyone. And it is not at all necessary to look for expensive material to get an interesting craft. It is enough to take a landscape sheet, an inexpensive set of colored paper, or even cutting wallpaper.
Everything is suitable for creating original crafts. From paper and cardboard, you can make not only products for an exhibition in a kindergarten or school, but also gifts, postcards and even toys, including doll houses. If you approach the solution of such issues creatively, you can get a great result out of nothing.
 Bright and original crafts made of thick colored paper
 Rules for working with paper and cardboard
To begin with, you need to consider that these materials are only the basis. In any case, the master will have to use additional parts or fixtures.
Some of them are quite dangerous, so the child must be instructed by adults, and even better, work on crafts with their parents. Both glue and scissors can pose a serious threat to preschoolers, so adults should always supervise the process of making paper and cardboard products.
 The choice of cardboard depends on the goals of the craft and the financial capabilities of the parents.
 As for the base, it can be different. It all depends on the type of product. You should also take into account the age of the child.
For example, if we are talking about a baby who is not yet 6 years old, then he cannot cope with thick corrugated cardboard. Cutting out elements from it, the child may get hurt, so the help of adults will be required.
 For the smallest, simplicity is the key to success in creating crafts.
 To begin with, you should choose paper with a low density. If we are talking about bulky products, then light material is best suited, which quickly takes and perfectly holds the desired shape.
When the child has trained well enough on applications, cutting out various elements and gluing them, you can move on to more complex work. It's about origami.
In it, you can make both simple and very complex crafts. The best option for working in the origami technique would be glossy or coated paper.
It allows you to get perfect and very neat folds, which is especially appreciated in the origami technique.
On a note! For postcards, applications and other crafts, thick colored paper is best suited.
If desired, you can make crafts from medium-density colored cardboard.
This will allow you to get durable products that do not crumble ahead of time, do not wrinkle and will keep their shape perfectly.
Lush bouquet of cardboard and paper
In order for a child to congratulate his mother or on International Women's Day, postcards are most often created. But it will be much more interesting to make a whole bouquet of paper, especially since it is quite simple to manufacture. However, if the baby is still too small, he needs to work under the supervision of adults, since here he must be able to handle scissors and glue.
 Bouquets or individual buds made of paper and cardboard look very impressive
 On a note! To work, you will need colored cardboard, white and blue paper, scissors and glue.
A pencil with a ruler will not be superfluous. As for scissors, it is best to prepare 2 options at once: with rounded ends and small scissors with sharp ones. They are needed for cutting holes and preparing small elements.
To make the stem of the flower, it is best to take thin green cardboard. A strip should be cut off from it, which is twisted into a long tube, the edges must be sealed so that the stem does not fall apart. If there is no green cardboard, you can take paper. But it will need to be twisted into a tube in more quantities in order to get a dense stem for the future flower. You will need at least 5 such tubes.
 Creating a stem for a flower
 Next, you should move on to the flower. To do this, take white paper, fold an A4 sheet lengthwise and cut it. One of the halves must be bent in half, and then made at one end, which does not open, numerous cuts.
Similar work should be done with the other half of the paper. The number of blanks must match the number of green tubes. If the bouquet will consist of 5 flowers, you can make 2 white and 3 blue blanks. Now you need to fix the edge of the strip on the top of the tube with glue. Further along the spiral, it twists.
It is best to stop approximately in the middle of the stem. Here you need to fix the edge with glue. At this stage, the flower will be almost ready. It remains to fluff it up a little so that it looks like a real hyacinth, and in addition to glue a few thin leaves.
This is how each piece is assembled. At the end, you should tie a bouquet with a ribbon. Together with such a gift, a postcard made of paper and cardboard, which you can make yourself, will look great. It is best to do it in the form of an application.
To do this, you need to take the base of colored cardboard, and then stick the flowers cut out of paper. If you write a sincere congratulation inside, then for any mother this will be the best gift for any holiday.
If mom is happy with the flowers, then you can congratulate her with a postcard and a thematic craft, for example, in the form of a tank. There are several options for making such products, including very simple ones that are perfect for working with young children.
 A cardboard tank will be a great gift for grandfather on May 9
 The tank is best made from corrugated cardboard (you can take it from the packing box). From this material, the base of the tank and some additional elements should be cut out to create a kind of three-dimensional effect.
To do this, prepare an additional part of the tracks and stars on the tank. In addition, you will need to duplicate all the details, but only in colored paper. The tank itself should be made green, the tracks should be brown, and the star should be cut out of red paper.
If you plan to make a do-it-yourself tank made of cardboard double-sided, you need to think it over right away and prepare additional elements. In this case, you will need an additional star and corrugated cardboard tracks, as well as an additional set of colored paper blanks.
 Scheme scan of the T-10 tank
 After that, you can proceed to the assembly of the product. First of all, it is necessary to glue blanks of colored paper to the cardboard base of the tank on one side and on the other. Next, caterpillars and cardboard stars are glued on each side. Brown and red blanks are attached on top.
Additionally, you can draw links on the tracks, designate the muzzle, hatch and other elements. The tank should be placed on a stand so that it is a complete craft that can be viewed from all sides.
To do this, cut out a couple of triangles from corrugated cardboard. An incision is made at an obtuse corner, into which the lower part of the tank is inserted. So the craft becomes more stable.
Such a product made of colored paper and cardboard can be presented to dad or grandfather on February 23, as well as sent to an exhibition at a school or kindergarten.
 Craft option for February 23 for dad or grandfather
 In addition to the festive tank, you can make a postcard. Patriotic options with a flag look very good.
To do this, you need to cut out strips of the desired color, stick them in the correct order on a cardboard base, and then supplement them with an inscription and a flower pattern.
On a note! If desired, you can make a postcard application with carnations.
The dream of any girl is a house for dolls. But often these toys are very expensive. However, creative parents will always find a way out of the situation. For example, a very beautiful dollhouse can be made from two rectangular cardboard boxes. In this case, you will need glue, wallpaper trimmings and colored paper, scissors and a stapler.
 Making a cardboard house is not as difficult as it might seem at first glance.
 First you need to prepare the boxes. Shoe packaging is the best for this. Such boxes are quite dense, it is convenient to work with them.
Moreover, they have the most suitable bottom. You need to check that they match in size. Next, you need to outline where the partition of the second floor will be, windows and doors, including interior ones. It is immediately worth noting where the stairs to the second floor will be.
After all the markup is done, you can proceed to cutting. It is necessary to carefully cut through the doors, windows, prepare the ceiling for the second floor and fix it.
The last element is best made from the lid of the box. In addition, you need to make a cardboard ladder and fix it so that the dolls can climb to the second floor. The remaining cover from the box can be turned into a gable roof to make an attic. Here you can also make a ladder, but folding from plain paper. Both parts of the house need to be fastened very tightly. To do this, use glue or a stapler.
 Finishing a cardboard house is no less interesting.
 So, the child will have a very beautiful dollhouse made of cardboard, in the creation of which the baby himself participated.
Interesting crafts made of paper, cardboard and other materials
In kindergartens and primary schools, exhibitions of children's art are often arranged. On almost any topic, you can make crafts from cardboard with your own hands or.
If at the same time to use additionally different materials, the effect will be more impressive. For example, if you take cardboard, paper and cotton wool, you can make a lot of interesting crafts.
 There are never any restrictions on the choice of improvised materials.
 It is from this set that a poodle dog is made. It comes in the form of a panel. To make such a craft, you need to take cardboard, stick a sheet of colored paper on it, and then draw a silhouette of a dog in the center. The next step is to use cotton wool. You will have to roll a lot of small cotton balls out of it.
Now the silhouette of the poodle is smeared with PVA glue, cotton balls are glued. The upper part of the head, ears, tail and paws should be especially magnificent. With a black felt-tip pen, you should designate the eyes and nose of the dog.
 DIY paper craft examples
 This turns out to be a very interesting craft made of paper and cardboard, which is easy to do even for a small child, since you don’t have to use scissors here.
Nevertheless, parents must definitely look after the baby during his creative work.
 Experts recommend to look after the baby during his creative work
 On a note! For the manufacture of crafts, natural materials are often used.
If you add them to cardboard and colored paper, you can get very interesting options. Cones are a convenient material for children's crafts. They will be useful both as a whole and disassembled, that is, in the form of scales.
From the latter, you can collect very beautiful flower arrangements. To do this, you need to take colored cardboard, stick a few circles of pine cone scales on it. These will be flowers. From them you can start branches cut out of colored paper. Don't forget the leaves.
 DIY decorative origami
 Cardboard for children's crafts is a very useful material. You can make anything out of it. Therefore, if the parents have a large corrugated cardboard box, do not throw it away.
It will be a great base for a house, rocket, tank or game car. The main thing is to turn on the fantasy.
Many very often ask the question: what can be made of cardboard? Such interest is quite understandable. First of all, its availability and low cost. It is not expensive, it is easy to get it. Even an ordinary household appliance box can be a source of many ideas. Among other things, such material is easy to work with, so even the smallest children can work with it. Despite the presence of a huge number of designer products in stores. Many people like to make original things with their own hands.
Why do you need designer cardboard crafts?
If we talk about cardboard crafts, it should be noted that their number is in the hundreds, or even thousands. First of all, these are very useful and very beautiful little things. These can be decorations in the form of garlands or decorative lanterns that can be hung out at a holiday. In addition to decorations, these can be very useful interior items that perfectly complement it. For example, a box or even a very beautiful vase. But it should be noted that cardboard itself, or rather its color, decorates the interior a little or attracts attention. It is much more interesting and exciting to decorate it with colored paper. This is done without problems. You just need to have imagination.

How to make decorative cardboard
To get decorative cardboard, you will need napkins for the kitchen, which have a variety of colors, a film, best of all food, gauze and an iron for it, and, of course, scissors. Before you start creating decorations on cardboard, napkins should be carefully ironed. They should not have any wrinkles on their surface. Having finished with napkins, the cardboard itself is laid out directly on the ironing board. Then it is covered with food film. Napkins are laid on the film, which are closed directly with gauze.

Then, with an iron heated to the highest possible temperature, all sections of the cardboard are evenly ironed. Pay special attention to its edges and corners. After that, the cardboard is turned over to the back, and the protruding edges of the napkins are cut off with scissors. Then this side is ironed again and turned over again and again subjected to heat treatment with an iron. Do not forget to use gauze with each ironing. As a result, a very beautiful and original blank for future crafts is obtained. Next, consider what can be made from such an original blank.
Cardboard hat for the holidays
Everyone, without exception, loves the holidays. Birthdays, New Years, anniversaries and many more. A cap can be a special attribute of such holidays. It is especially interesting for children. Adults, along with children, also love such decorations.

To create a cap, you need cardboard, glue and scissors. Decorations can be in the theme of the holiday. A cardboard sheet measuring 300x450 mm is rolled into a cone. The excess is removed with scissors, and the edges of the cone are glued together. In order for it not to fall off the head, it should be supplemented with an elastic band. To do this, holes are made in the lower part, into which an elastic band is then threaded. You can decorate such a cap thematically for the holiday.
cardboard box
In any house there is a myriad of little things that always have nowhere to put and they are lying around in a mess. In this case, the box will always come in handy. To make such an original box, you will need cardboard itself, scissors, adhesive tape, pencil, fabric and glue.

Draw a rectangle using a pencil and a ruler. This will be the bottom of the box itself. The future lid of the box is drawn in the same way. Similar sizes are drawn more quadrangles. These will be the walls of the box. The only note is that they should be 2 cm larger. Excess should be bent. Secure the folded edges with tape. The same should be done with the walls of the cover. The resulting products are connected to each other with the help of fabric. Then the cover is put on the base. The corners fastened with adhesive tape are glued together. You can decorate it to your taste. For this, you can use, for example, lace or various applications.
Cardboard is a very versatile product. What can be made from cardboard turns out to be very beautiful, unusual and designer. The cost of such things is minimal. Even a child can work with cardboard.
Helpful Hints
If you still have cardboard boxes left after buying electronics or other things, you don’t need to throw them away.
You can make a huge number of crafts from cardboard for both home and children.
Here you can learn how to make 5 very interesting and useful things out of cardboard, as well as see what incredible crafts some of the masters of their craft are doing.
DIY cardboard garland

You will need:
Sequins on the dress (sequins)
Stationery knife
Super glue or hot glue
Rope.

1. Draw even letters, geometric shapes or patterns on cardboard and cut them out.

* To get a letter on cardboard, you can simply use a ruler and a pencil, or you can print a letter on paper, put the paper on cardboard and cut out the letter with a clerical knife, tracing it along the contour.
2. Prepare sequins (sequins) and start gluing them to the cardboard. You can use different types of sequins and it is not necessary that the sequins be on a thread.


3. When all the letters or shapes are ready, lay them on a flat surface back to front and in reverse order and glue the thread to them.

When the glue dries, the garland can be hung.

How to make a desktop organizer out of cardboard

You will need:
25 sheets of cardboard (25 x 25 cm)
Ruler
Pencil
Stationery knife
Glue brush (if necessary).

1. Using a ruler and a pencil, draw on one sheet of cardboard the places where you want to make indentations (for pens, small things, etc.), leaving at least 2.5 cm from the edge of the cardboard.
2. Lay the finished piece of cardboard on the new sheet, circle the places where you made the holes and cut them out of the new sheet.

3. Repeat the same steps with other sheets, but at the end leave 5 sheets intact.

4. Begin to carefully and evenly glue together all the sheets with holes. You can use a brush to apply glue. You can first glue 5 sheets, then five more, and so on until the end.

5. Glue 5 intact sheets together to make the bottom of the organizer.
6. Now it remains to glue the bottom of the organizer to the cut out part of the 20 sheets.

Let the craft dry overnight and then you can use it.

DIY Cardboard Crafts: Geometric Lamp

You will need:
Thin cardboard
Scissors
Stationery knife
PVA glue or hot glue
Ruler, compass and pencil (to draw a pentagon)
LED light bulb (it is important that there is an LED light bulb so as not to burn the cardboard)
Lamp socket.
1. Start drawing pentagons on cardboard (a figure with 5 identical sides). To begin with, you need 11 pieces, later about 10 more. In this example, the side size of each pentagon is 6 cm, but you can choose a different size, as long as all the shapes are the same size.

How to draw a pentagon (video)
To draw an even pentagon, watch this video:
Once you have drawn and cut out the pentagon from cardboard, use it as a template to trace and cut out the rest of the pentagons.
2. Within each of the 11 pentagons, draw 5 smaller pentagons. In this example, the distance between them is approximately 6 mm.

3. Using a utility knife, cut out all the shapes from each cardboard pentagon (see image). This is the longest process, but it is quite simple.

4. We begin to collect parts.
Prepare one group of 5 pentagons. Lay the largest one on the table, and glue the next largest on top of it so that its ends touch the sides of the large pentagon. Continue in the same style until you have glued all the details.


5. Repeat step 4 with the remaining groups of pentagons.
6. We assemble the lamp.
When all the details are assembled, you can assemble the lamp. Lay one piece on a flat surface and start gluing the rest of the pieces to its sides. Try to glue so that the adjacent parts also have glued sides (see image).

* You will have to lift the figures a little. You will get something that looks like a vase.


7. Now you need to make the base for the lamp. To do this, you need to draw a few more pentagons (in this example, there are 8 of them) and cut them out.
Inside each shape, draw another pentagon (1 cm from the edge) and cut it out. Remove the cut out part and carefully glue together all the other parts.


8. For the light bulb, you need to cut out another pentagon and make a hole in it for the lamp holder.


9. Glue the part from step 8 to the base of the lamp.

10. With the bulb attached to the base, position the bulb where it should be (on the base) and make a small cut (or hole) for the cable. You can add some glue to better attach the base to the lamp.


DIY wall decoration made of cardboard (scheme)

You will need:
Scissors
Pencil and ruler (to draw some squares)
Acrylic or spray paint.
1. Cut the cardboard (cardboard box) into several squares of different sizes.

2. Color all squares. In this example, a metallic color was used.

3. Prepare a large sheet of cardboard and paint it.
4. Start painting all the other squares and glue them to the big sheet.

* Glue as you like.
5. You can stick the work to the wall with double-sided tape or simply put it on a shelf against the wall.


Do-it-yourself cardboard furniture: a shelf in the form of a cloud

You will need:
Several sheets of cardboard
Stationery knife
Pencil
Scissors.
After the text instructions, you can find a video instruction for creating this shelf.
1. Take one sheet of cardboard and draw a cloud on it. It's best to draw with one side of the cardboard sheet serving as the bottom of the cloud (see image).
2. Cut out your cloud with scissors.
3. Use a cardboard cloud to make a few more of the same blanks - circle it on each sheet and cut it out.

* In this example, 23 sheets of cardboard were used - 3 sheets will repeat the shape of the cloud and 20 will be "inside" the cardboard structure and they have a similar structure, but cardboard can be saved in them (see video).
4. Cut the unused cardboard into small pieces to be glued between the cloud pieces
5. Start gluing carefully and one by one all the parts of the shelf, remembering to glue pieces of cardboard between the parts (see picture).

6. To hang a shelf, you first need to attach one hook and one carnation (see video) and hang the shelf on them.
How to make a cardboard shelf (video)
DIY cardboard chandelier (photo)


Paper and cardboard crafts: a mirror decorated with cardboard details
All small parts are made from cardboard rolls from paper towels or toilet paper.
First you need to cut the roll into rings of the same thickness, and press these rings down with a motor. From the received parts you can make beautiful decorations and crafts.
We will send the material to you by e-mail
For some, the cardboard left over from the boxes is junk material, while others are not afraid to revive it and turn it into various funny objects. Especially relevant is the use of cardboard leftovers in a house where there are small children. Today we are arming ourselves with tips and ideas and together with the site we will see what can be made from cardboard for the home and for children.
Cardboard is an excellent material for crafts with children and for decorating the interior.
To make something useful for the game, you can take the usual thin cardboard for children's creativity, and there is the option of using cardboard boxes left over from furniture, appliances, food. Depending on the quality of the material, the craft is strong, durable and beautiful.
Cardboard figurines for different games
To make cardboard figures, you will need good sharp scissors and a clerical knife, adhesive tape, spray glue or a heat gun. To paint the craft, it is worth preparing a set of gouache or felt-tip pens.
Mermaids
To facilitate the process of creating mermaids, the child is offered to take not a sheet of cardboard, but a toilet paper sleeve: this is a ready-made material that is decorated using the appliqué method.
If there is no sleeve, and you want to complicate your life a little, then you need to take a sheet of cardboard and cut a rectangle out of it. The figure is bent so that the width of one edge slightly overlaps the width of the other. It turns out the cylinder, which is used as the basis for the mermaid.
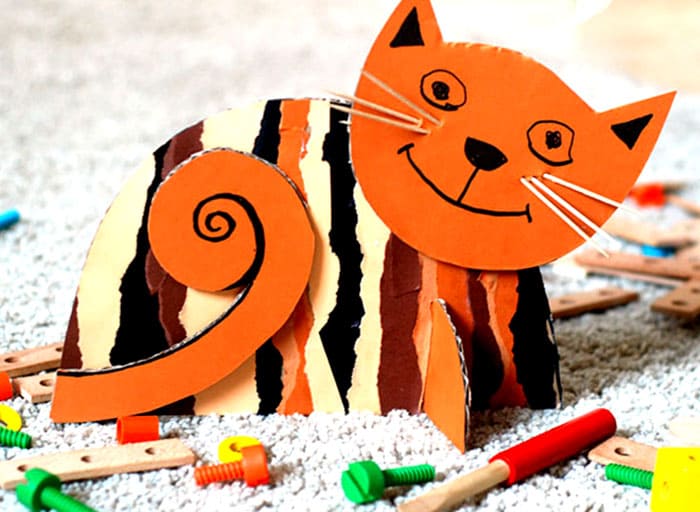
wonder cat
A cute cardboard pet should have enough density to withstand baby caresses. The work is not difficult: we cut out the shape of a cat according to the template and make cuts in place of the paws along the contour.


Save Time: Featured Articles Every Week by Mail
What kind of transformations does cardboard not undergo?! Recently, more and more photos of cardboard crafts have appeared on the Internet.
But if earlier cardboard experiments could be found in kindergartens and at art lessons in elementary school, today the audience of fans of this lesson is expanding in completely different age categories.
Moreover, paper and cardboard crafts made by amateurs can serve not only as entertainment for kids or a modest present, but also as a presentable interior panel, designer gift packaging, an exclusive jewelry box, and even a sculpture, not a toy furniture or home.
Material preparation
How to prepare cardboard for your favorite business? On your own or buying in expensive stationery departments? In fact, cardboard is much more common in our everyday life than we think, so it is not necessary to buy it specially. Here are a few sources through which you can accumulate the necessary amount of raw materials:
- - various packaging: boxes, cylinders, packages;
- - inner liners for toilet paper rolls, cooking parchment, cling film, etc.;
- - details of packaging for tights.
As can be seen from the above, do-it-yourself cardboard crafts, in fact, can be made from garbage, and what else ?! If you need colored material or more exclusive raw materials, then you can always buy it, if not in a stationery store, then in the scrapbooking department.
Regarding the tools, nothing special is needed, except for scissors, as well as a breadboard knife, glue, paint and a few auxiliary attributes at the discretion of the amateur craftsman.
There are several of them, but the most elegant, by right, are postcards. In second place - products in the technique of application. On the third - cardboard crafts for children: castles, housing and furniture for dolls. Let's look at each of these ideas in more detail:
Postcard
One of the varieties of crafts made of colored cardboard. Working with such a product, one cannot do without a printer (for copying a diagram, increasing it to the required size and printing). The next step is to transfer the design onto cardboard and cut it out with a craft knife.
The final touch is gluing the workpiece onto a cardboard base of a different shade and slightly larger size. The base is usually rectangular in shape. It is divided into two halves. The place of the bend is drawn with a thin crochet hook, the tip of scissors or an empty rod of any pen.
An important condition is that it is necessary to draw a fold under the ruler. After it, the fold is carefully ironed from the outside. The front side is decorated with any decorations: beads, paper applications, rhinestones, bows, etc.
Such a product has a 3D effect, as it has a three-dimensional part, so it is not surprising that it can serve not only as a pleasant addition to a gift, but also as an excellent independent present, in which not only money is invested, but also the soul of the performer.
Applications
This technology allows you to create gizmos that combine simplicity and childish immediacy. Such decorations can decorate not only the interior of the nursery, but also more pretentious, in terms of high taste, rooms.
For example, you can make a panel "Seasons", consisting of 4 parts. The ideal cut for him would be a plywood frame cut from a 4 mm plate.
The surface of the frame is sanded with sandpaper and covered with a colorless varnish. In the absence of plywood, the frame is made of thick cardboard, divided into 2 parts: the lower one (a square with a colored cardboard application) and the upper one (the actual frame, a slightly smaller base). The lower part should peek out of the frame by 2 mm. The frame itself is also decorated with appliqué.
Kids toys
The most suitable raw materials for this category are rolls on which toilet paper is wound, as well as various cardboard boxes.
So, a medieval castle made in this way will become a favorite toy attribute for both boys with their knights and girls and their princesses. To do this, it is enough to attach toilet cylinder liners to the cardboard base, supplementing them with cone-shaped roofs, cut again from the same cardboard.
Separate turrets can be left without roofs, having decorated their top with battlements. The docking of the towers occurs with the help of slots in the cylinders themselves. The textured surface of the towers is made of transformed toilet paper treated with PVA glue and painted with acrylic paints.
cat's house
A separate masterpiece, which a pet will also enjoy, can be a house made of packaging corrugated cardboard, for example, from a TV.
The technology of cardboard crafts is as follows: circles are marked on corrugated cardboard with a compass or bowl, which are then carefully cut out; from round parts, according to the principle of puff pastry, a house of almost any shape is glued together (from conical to cup-shaped, tapering upwards).
If corrugated cardboard is not enough, then you can simply take a cardboard box, cut out windows and a door in it, not forgetting about the decor of the exterior and interior. In any case, if the idea has already matured, but it’s still hard to imagine how to make cardboard crafts, the Internet will help!