In the last article we looked at how it is done. Today we will analyze the structure of a box kite. A box kite flies higher and stays more stable in the air. They come in different designs and sizes, let's look at one of the simplest models of a box kite.
How to make a box kite
We will assemble the frame of the box kite from four vertical slats 80 centimeters long, 4 horizontal slats (spacers): 2 75 centimeters long, 2 50 centimeters long. We plan all the slats to the same cross-section - 8x8 millimeters.
From sheets of thick paper we glue two strips, each 188 centimeters long and 26 centimeters wide. Along the edges on all four sides we fold small strips - allowances - 1 centimeter wide. Thus, the dimensions of the strip without allowances will be 186x24 centimeters.
We divide each strip lengthwise into four equal parts, 46.5 centimeters each, and bend them in the marked places. We cut out the corners on the folds in the allowances, then insert strong threads of such length into the folds of all allowances along the length of the strip that their ends extend into the cut corners on both sides by 6-8 centimeters. After this, we glue the allowances to the strip. If the paper was not thick enough, then for strength, we will also lay a thread in the middle of the strips, sealing it with a narrow strip of paper.
We glue the narrow edges of each strip with side allowances - we get two boxes without a bottom. Inside the boxes in the corners we put long slats and, having made light notches in the right places, we tie them with the free ends of threads glued to the edges of the strips. We place the boxes at the ends of the long slats.
At the ends of the spacers we will make legs for long slats: with thread and glue we attach two thin slats to two opposite ribs and cut out a recess at the ends. We will insert two spacers into each box (their legs should rest against the long slats). First we install the long spacers, then the short ones. At the crossing points we will tie both spacers together with thread. Stretched by spacers, the kite boxes will take on a diamond shape.
We will make the box bridle from thin twine 130 centimeters long. We will tie one end of the bridle to one of the long slats above the upper box, and the other to the same slats above the lower box.
A box-shaped kite is launched on a rail made of thin twine or very strong coarse threads. We will tie the leer to the bridle so that the length of its upper part is equal to 55 centimeters, and the lower part – 75 centimeters. A box kite does not need a tail.
Attention:The dimensions in the picture do not match the dimensions in the description, since the picture is posted as a visual example.

Attention: They fly a box kite, just like a flat one, with two people flying against the wind. The oncoming air flow puts pressure on the kite and provides resistance to it. The wind carries it forward, but at the same time a lifting force arises, due to the fact that the bridle of the box kite is oblique, and it is held in the air at an angle, obliquely. In aviation, this tilt is called the angle of attack. The wings of gliders and airplanes are also installed at an angle of attack, with a slight inclination to the oncoming air flow. If the kite's bridle is made straight, from threads of the same length, then, having no angle of attack, it does not rise up even in the wind.
In windless, calm weather, a kite can be made to fly if you run forward with it. The movement creates a counter flow of air necessary for flight. When launching a box kite, the launcher also runs forward to make it rise from the ground. At the top, the box kite flies on its own, although the launcher stands still. This is explained by the fact that air currents are always stronger at the top; on the surface of the earth, the air can be calm, and at the top at this time the wind is blowing.
Marina Suzdaleva
Summer time has come. Children are spending more and more time outside. And although there are many interesting ideas, what to do with a child in the summer, creating with your own hands and then flying a kite can become the most vivid and memorable event for the whole family. The participants of “” were convinced of this from their own experience and share their ideas and impressions with us. A large gallery of kites of various shapes and colors will surely inspire you to create your own conqueror of the air!
We decided to make a kite. We found some simple instructions on the Internet and started making them.
We acted like this:

My daughter actively participated in the process and helped: she attached the sticks together, taped the packaging, and made bows. As it turns out, it's not difficult at all. And how much delight, squealing and laughter there was when flying the kite! Such emotions of a child are definitely worth the effort and time spent.
Gudimova Olga and daughter Varvara, 5 years old.
Kite "Monk"
She suggested that her husband make a kite with his daughter. As a result, he got carried away and began to work on his own, so in the meantime my daughter and I decided to make our own kite. This activity was new to me, so the choice fell on the simplest “Monk” model.
 Materials and tools: thread, A3 sheet of thick paper, scissors, PVA glue.
Manufacturing process:
- Cut out a square from a sheet of paper.
- Carefully bend the edges along the axis as shown in the diagram. Fold down the corners of the paper. The angle may be slightly smaller than in the diagrams - whatever is more convenient for you.
- We bend the edge of the bent corner again so that we get something like an accordion or spring.
- We make a “bridle” - cut a piece of thread about 30 cm long and glue it into the resulting paper pockets.
Here my daughter decided to color our snake :)

While the snake is drying, prepare its tail. This is important, the kite will not fly without a balancer. For the tail, I used several pieces of wool thread about 50 cm long. We put them together and tie them into a tassel closer to the end of the tail. Cut out a triangle from waste paper and glue the tail. We tie a skein of regular thread to the bridle. The snake is ready. 
The launch of our “firstborn” was successful. The kite did not fly high, but confidently!
Kudryashova Nadezhda and Anya 4.7 years old, St. Petersburg.
Red snake
Vladik made the kite together with his dad. For the base of the kite, 2 balloon sticks were taken. They were fastened perpendicular to each other. Then a nylon thread was pulled around the perimeter.
Next, a quadrilateral was cut out of paper with additions for the hem. The edges were folded and glued to the thread around the perimeter. A nylon thread was pulled from the three upper corners of the kite to the center and secured. 
To control the kite, one end of a thread was tied to the resulting center, and the other end was wound on a homemade spool from a toilet paper roll.
Finishing touches: the snake was painted and its tail was made from thread with strips of wrapping paper tied to it. The snake is ready! 
Lidia Maloletkova and son Vlad, 6 years old.
They started making a kite as soon as they received the task in the Ecological Expedition. Moreover, it turned out to be two kites, because There are two children and one common option is not yet available. I took a diagram of the simplest kite from the Internet; it turned out to be the “Monk” kite.
I took thick paper, folded it according to the pattern, and the children began to color. Vanya depicted it with blown felt-tip pens (we had a stencil), Nastya tried to blow it out, but she thought it was too long a process, and then she simply painted over the stencil, and I traced the outline. 
After the design work, I glued the ends of the thread into the wings of the kite with Moment glue. I used a strong thread. And woolen threads went to the tail.
They launched it at the dacha, but by that time the second kite had disappeared somewhere, so only one flew... So much delight! Thanks for the idea!
Ekaterina Adnodvortseva and children Vanya 4 years old. 8 months and Nastya 3 years old. 3 months, Moscow.
Daniel and dad made a kite. The process was simple. Found a description on the Internet. We sawed off two sticks of the required size, fastened them perpendicularly with electrical tape and stretched a fishing line around the perimeter.

We had a very large ball, dad cut a suitable piece out of it. We connected the sticks and this piece, also using electrical tape. We attached fishing line to the top three corners and tied everything together. A fishing line on a reel was tied to the resulting center. The tail was made from strips of fabric. There was a lot of joy. Tomorrow dad is at home, they will launch it.

Lyudmila Shatalova and grandson Daniel, 5 years 2 months. with dad, Israel.
They made it into a friendly group of three girlfriends. It’s so joyful for my daughter when we not only work with her together, but also with her friends. She herself tells me: “Mom, let’s make a snake when Polina comes to us!” This is very important for children - to do it together, to be able to negotiate during the work process, to give in somewhere... 
Then they merrily flew kites onto the stadium field: squealing, delight, running around! And other children looked at us with interest!

It is very interesting for us to participate in the Ecological Expedition. But the process sometimes remains behind the scenes. We were so busy making kites that I forgot to take a photo. Yana is at the table after a walk, and on the table is her snake and the remains of a tail (she later made a toy out of them for the cat).
Larisa Fedotova and daughter Yana, 6.6 years old, Barnaul, Altai Territory.
We made a kite from cardboard paper and ordinary threads. Ilya often makes something himself, some boxes with secrets, recently he made a multi-colored cocked hat. I am always pleased with such children's creativity. The most interesting thing is that I didn’t tell Ilyusha that I wanted to make a kite with him. I come home from work, and he started making a kite. Our wishes coincided in an amazing way.
Tired of boring walks?

My son Ilyusha and I made a kite yesterday; it didn’t fly fully, but it was still fun to run around with it. And in the evening I bought a ready-made kite, let's try to fly it.
Ksenia Gladilina and son Ilya, 7 years old, Dolgoprudny
Kite "Penguin"

Creation and launch process:


Roman Batalov, 8 years old, Kirov
We made the kite from improvised materials: to make the frame we used a bamboo mat on which we stretched a piece of plastic bag cut in the shape of a rhombus. The tail is also made from a bag. 
Our kite was only able to fly to a low altitude (there was no suitable wind), but the children had fun - they ran after it like kittens after a bow! We will also try to fly the kite in windy weather.
Anastasia Zotova and sons Grisha, 4 years old, and Andrey, 1 year old. 3 months, Vladivostok.
This is a very simple model, but it is important to us that our son assembled it himself inside and out.
Timofey: “An amazing snake made from drawing paper and my mother’s threads. It flies well in windy weather, but in zigzags. That's why I named him Zig Zigus." 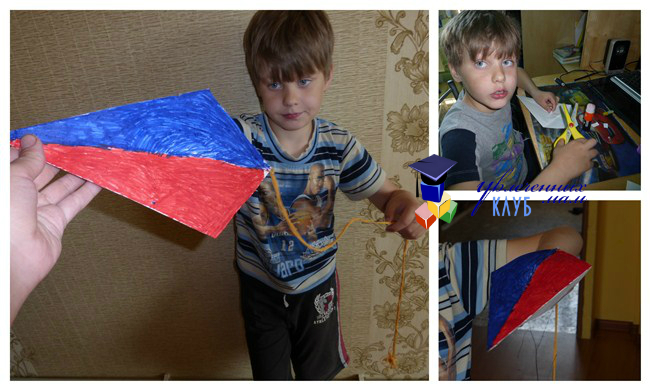
Timofey Vernyaev 7.5 years old, Meget village, Irkutsk region.
On the Internet I found the easiest way to make a kite. For several days I asked our dad to find us a couple of slats. As a result, after a couple of days, dad planed 5 slats for us))) The whole family participated in the process of creating the kite! Everyone was so interested in this...
To create the kite, only two slats were needed, but there was no time to waste, so dad sat down to make another kite, and from the remaining slats, the eldest daughter decided to “cook up” another one.
If we describe the creation process itself, then:
- We cut the sticks - long 60 cm, short - 35 cm, folded them perpendicularly and secured the cross with tape.
- The ends of the sticks were wrapped with tape and cuts a centimeter deep were made in them.
- The fishing line was pulled through these cuts, creating the contours of the kite.
- We placed the frame of the future kite on polyethylene (I took a regular bag and cut it, my husband took transparent polyethylene). We outlined the kite with a marker, adding 1.5 cm on each side to the hem, and cut it out along the contour, folded the edges of the film inward around the fishing line and secured them with tape. The “body” of the snake is ready.
- Then they made a bridle and tied it to a long fishing line. Made a tail.

At this point, the process of parents working with children ended and the creative process of children began. They drew flowers, some patterns and put a clown and a bear on a kite so that they could fly (added stickers).

Both children and adults are delighted with this fun - flying a kite. They are triangular, diamond-shaped, box-shaped, in the form of birds or dragons. They even come in the form of a butterfly flapping its wings.
The history of the flying kite begins in ancient China. There it received the name “dragon kite” due to the fact that on the Dragon Festival, huge constructions of paper bodies with a snake head at the end were launched into the air. This tradition is still alive today. From China, dragons became widely known in Asia. Later, in Europe they learned how to make a kite out of paper.
 Over its long history, this simplest aircraft has served science more than once, as a military tool, and helped in the development of aircraft. Now it has turned into a well-known toy, popular with both adults and children.
Of course, in the modern world you can always buy a ready-made kite in a store. But if you know how to make a flying kite with your own hands, you can not only enjoy the creative process, but also get a unique toy. Created with your own hands, it will be a greater joy than the one purchased. The manufacturing process is very interesting, exciting and also uncomplicated. And the manufacturing costs required are minimal.
How to make a flying dragon with your own hands
To create an air dragon at home, you need to have a basic understanding of the main elements of its design:

At home, you can make the following types of flying dragons: flat air and box-shaped (volume).
The materials for making your favorite toy can be different, for example, paper, fabric, polyethylene. For some models you will need wooden slats. For the tail you will also need ribbons or threads with bows or tassels: it all depends on your imagination.
Snake "Monk"
How to make a flying kite out of paper? Try the simplest and most classic option first - the paper “Monk”. Even small children will be happy to take part in its production. To make this origami, you will need:
- a square made of a sheet of thick paper (not newspaper);
- spool threads for bridles;
- narrow strips of bright fabric or ribbon for the tail;
- scissors;
- glue;
- needle for making holes.
It is advisable to choose sheets no larger than A3. Larger sizes require higher paper thickness, which leads to an increase in model weight. As a result, a large device may become so heavy that it cannot take off.
The scheme for its manufacture is simple:

 Despite the ease of manufacture, the Monk will fly well. It must be launched on spool threads, in a slight breeze, because a strong wind can easily crush it. If it starts to spin from side to side when starting up, the tail may need to be adjusted. You need to either lengthen it or make it heavier. In the case when the Monk takes off with difficulty and gains altitude very poorly, the tail, on the contrary, should be made lighter. When the tail is adjusted correctly, the kite should fly steadily, wagging slightly in different directions.
Frame snakes made of paper, fabric, polyethylene
Another type of flat flying structure is the frame kite. To build it, in addition to paper, fabric or polyethylene, wooden slats are also needed And. One of the schemes for its manufacture is used in the presence of the following materials:
- sheets of paper or bag;
- two wooden slats (one is shorter, equal to approximately 2/3 of the length of the first);
- strong thread;
- fabric (any);
- scotch;
- glue.
 To create a frame, you need to connect the slats in the shape of a cross. You can fasten them with twine, pre-moistened with PVA glue. Then you need to cut out, focusing on the frame, the sail of the dragon itself. For this model it will be diamond-shaped. The ends of the sail must be firmly tied to the ends of the slats; you can even use tape for strength. In the middle of both sections of the smaller rail you need to tie ropes and secure them in the middle cross rail. You will get something like a pyramid of ropes, which needs to be secured to a railing. It remains to secure the tail at the bottom of the product. For good flight, the tail must be significantly longer than the main part.
Frame devices are the most popular and are easy to build at home. They can have any other shape: the popular triangle, star or bird. The form is limited only by imagination and materials.
Dragon in the shape of a triangle
The classic triangular shape is a more difficult to manufacture variety of flat structures.
You will need a thick plastic bag for this., slats, rope with reel. The dimensions of the finished product depend on the size of the package and the height of the launcher. The manufacturing scheme for a triangular kite is as follows:

To resemble a bird, one feature is used: a bowstring is pulled between the side parts.
Box kites at home
Another type of flying kite that you can make yourself is the box-shaped, or three-dimensional, flying kite. To make it you will need:
- wooden sticks - 8 pieces;
- sheets of thick paper;
- strong rope;
- ruler;
- scissors;
- glue.
 For the manufacture of a box-shaped device At home, instead of durable paper, durable plastic bags, for example, garbage bags, are often used.
The frame is assembled from 4 vertical slats 80 cm long and 4 horizontal slats (spacers): two 75 cm long and two 50 cm long. From sheets of thick paper using glue you need to make two strips, each 186 cm long and 24 cm in width, plus 1 cm on all sides for allowances. Each strip must be divided into 4 equal parts.
Corners are cut out on the folds in the allowances and strong threads are inserted into the folds of all allowances along the entire length so that they extend into the cut corners on both sides by about 7 cm. Then the allowances and strips are connected with glue. The narrow edges of each strip are connected by side allowances - you get two boxes, but without a bottom. Long slats are placed inside the boxes at the corners and secured with the ends of threads glued into strips. The boxes should be located at the edges of long wooden slats.
Then spacers are placed crosswise so that they rest against the long slats. In places where the spacers intersect, this connection must be secured with thread. The kite boxes stretched by spacers will look like a rhombus. The bridle is made of a thin rope 1.3 m long. One end of the bridle is connected to one of the long slats above the upper box, and the other is attached to the slats above the lower box on the same side. A handrail is attached to the bridle - and you can do a test run. A tail is not required for such a kite.
A box kite can only fly properly in fairly strong winds. Its improved version is a triangular box kite with an additional wing. This type of kite is more complex in design, but it has better aerodynamics, and it takes off in light winds without a run-up.
How to fly kites
 Flying a kite correctly is very important. The wind should blow at a speed of 4−6 m/sec. The most preferable place to launch is a field and, if possible, a hill, away from roads and away from wires. It is dangerous if the line of a running kite comes into contact with the wires or hangs on them. Especially if these are high voltage electrical wires. It is also important to take into account the strength of the wind and the strength of the handrail. If there is a strong gusty wind outside, the rope may break and the wind will blow the flying kite onto the wires.
You can launch a flying toy in different ways. If a person is alone, then the kite is placed with its front side facing the wind. The one who launches must gradually move backward, unwinding the rope and keeping the structure vertical. Having moved away a little, about 10 meters, you need to pull the rope towards yourself and run carefully. If there is wind, the kite immediately rises up.
It is much more convenient and easier to launch together. So, one remains with the kite, holding it above his head. The person holding the rope must stand with his back to the wind and unwind about 15 meters of the rope, then pull it tight. The sign to fly a kite is to raise your hand.
When the kite reaches a sufficient height, you must carefully release (poison) the line. If a gust of wind occurs, the rope must be released a little, this is necessary to relieve the pressure of the air currents on the body of the structure. When the wind subsides, the flying device must be immediately pulled towards you.
 It is better to launch a box kite in the same way - against the wind and preferably not alone. The headwind will carry it forward, but at the same time a lift will arise and it will remain in the air at an angle. If the bridle is made straight, from threads of equal length, then the kite has no angle of inclination and will not rise up even in a strong wind.
On a windless day, you can try to make the kite fly by running forward with it. In this case, it is not the wind, but movement that creates the oncoming air flow that is needed for flight. At the top, a box kite flies on its own, even if a person does not move, because at the top the air currents are stronger than at the bottom near the ground.
If you want to have an interesting time, find an exciting activity for the whole family, then making an air dragon is perfect for these purposes. It’s not difficult to make it yourself, and its launch will not leave anyone indifferent.
Attention, TODAY only!
Both young children and adults love flying a kite. However, factory versions are often quite heavy and difficult to manage: it is not easy for a child or a fragile girl to hold them. We offer you an obvious solution: make a simple kite at home.
The master class will be quite easy, so you can even involve children in creating this craft. This will be even more interesting: if a child makes a kite with his own hands and then tries it out, he will be even more happy. However, at some points you will have to help him.
Do not give up creating a kite if you do not have children. You can play this toy at any age! If you want to have a great time, but still don't want to shell out for a kite, make your own. This will take very little time, and you probably already have the materials on hand.
What do we need?
- newspaper
- wooden plank with a diameter of 1 cm
- twine
- scotch
- decorative ribbons
How to make a kite?
We take a wooden plank and saw it. We need to get two sticks: the length of the first is 50 cm, the length of the second is 60 cm. The planks can be round or flat. The main thing is that they are not hollow, otherwise the kite will turn out too light. At the edges of each strip we make a small transverse cut so that the thread can be pulled over it.

We place the long bar vertically. At a distance of 15 cm from its beginning we place a 50 cm blank. We do this so that it is divided in half. That is, we stack the sticks crosswise at a certain distance. We rewind this place with twine.


Then we fasten the edges of our future homemade kite with twine. It needs to be threaded through the same cuts that we made along the edges.

We put a newspaper on the table (if you want, you can replace it with beautiful cardboard). Cut out a diamond shape. We need to make such a contour so that the edges stick out about 2-3 cm.

You can add a drop of glue to the tip of each stick for reliability. Next, attach the paper kite blank to the wooden body using narrow tape.

Thoroughly glue the nose part of the craft - it will be decisive. The kite meets the air with this part, and it must be very reliable.

Now you need to cut a thread 1 meter long. It needs to be secured to the top and bottom of the kite blank. It should look like a big “handle”. Later we will tie a long thread to it, by which we will hold the structure.

Have you ever flown a kite with your children? But in vain, because this is not only a fun activity, but also a great way to diversify country walks and trips to the country. And if this flying miracle is made with your own hands, and even with the help of a baby, such a family weekend will be filled to the brim with joy, pleasure, and positive emotions.
How to make a paper kite
A paper snake is a simple craft that even a child can construct under your guidance. You just prepare the necessary materials and control the process.
For work you will need: a sheet of thick paper, strong threads, tape, scissors, a stationery knife, felt-tip pens. The ribbon for the tail is 3 cm wide, 4-5 meters long.
Please note: a kite consists of a body, a bridle (tie), a tail, a thread (rail), and a spool for winding the thread.
Start with the body
Make a square out of paper and bend it diagonally. Fold both sides to the fold line. Bend the corners of the resulting figure on both sides. Use an awl to pierce holes for the bridle in places just above the inner corners (circles in the photo).
Make a bridle
The bridle is the place where a rope or thread is attached to the body, with the help of which you can change the inclination of the kite in relation to the wind.
Pass the thread through the holes made, secure it to the body of the kite with knots and adhesive tape. Pull the bridle to the required distance, making a loop in the middle of the fold - tie your thread here.


Create a tail
For the tail, take the ribbon you saved and tape it to the bottom of the structure.
Please note: the tail must be no shorter than 1 m and no longer than 5 m.
Glue a paper accordion bow or thin strips of polyethylene to the tip of the finished tail.

Make a reel
Cut a rectangle of cardboard - 10x20 cm, fold it in half. Mark the hole for the hands and threads with a pencil, cut with a knife according to the mark. Wrap the spool with colored tape or color it with felt-tip pens. Wind 20 m of silk thread onto a spool, and tie two matches to its end - they will be needed to secure it to the bridle on the snake.


How to make a kite from a package
A simple option, both in production and materials. All you need is a thick plastic bag, scissors, 2 thin wooden sticks or slats, tape, ribbon, long rope.
- Prepare sticks for the frame, one 60 cm, the other 20 cm. Fold them perpendicular to each other (in the shape of a cross). Step back 15 cm from the top of the long rail and secure both spacers with rope or tape.
- Place a frame of sticks on the bag and mark their ends with a marker. Connect all the dots and cut out the resulting quadrangle from the bag. This will be the kite sail. Secure its corners with rope at the ends of the sticks.
- Wrap a piece of twine to each center of the short strip, and tie a rope on the long one and connect it to the cross stick. The result was a bridle. Attach a rope to it that comes from the reel. Glue the ribbon tail, paint the sail, let the structure dry and the craft is ready.
